Lead Generation continues to be a very effective form of marketing as you’re able to capture information from individuals interested in your company’s product or service. With smartphone penetration growing at an alarming rate across the globe, many companies are using this trend to their advantage by capturing information from potential customers to interact with them on a more personable level with hopes of later selling them. By capturing an email address and/or phone number your company is able to follow-up with the prospect and answer any additional questions they may have before purchasing.
The entire crew here at iMobiTrax has been doing lead generation for large companies for many years. We built the software to allow clients the ability to track this information right down to the device size so no metric gets overlooked. With the massive volume of mobile traffic and the cheap clicks a huge opportunity becomes available for all lead generation companies to acquire more leads even cheaper than desktop advertising.
For our software to begin tracking this important information you first need to have your landing page setup that includes your opt-in form with the fields you’re looking to acquire. In this example, I’m going to use AWeber to build out a web form that collects Name & Email Address:
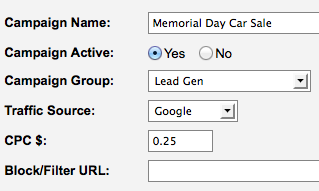
A basic web form that can easily be inserted into my mobile landing page. In my example here I’m going to demonstrate how we 1) Capture Name & Email 2) Thank The User 3) Send Them Out To A Related CPA Offer. To get started we want to create a new “Path” campaign inside iMobiTrax. I’m going to name the campaign just as I would with any other type of campaign, assign it a group (mine is called lead gen), select the traffic source, and define my initial cost per click (CPC):
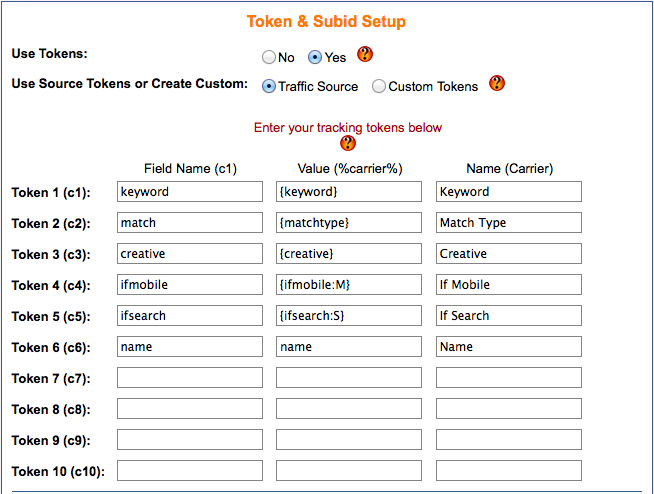
By default “email” and “phone” are recognized by iMobiTrax but any additional fields will need to be defined as custom tokens during campaign creation. We simply select to use tokens and then we can user traffic source or custom (it doesn’t matter as long as you manually enter in the fields you’re wishing to track). In my example I’m going to use the Traffic Source tokens (Google) and then add a custom field for name:
We then have the option how to handle the SUBIDs. To keep this tutorial simple I’m going to leave it default and only pass the iMobiTrax Subid to the CPA offer. If you are promoting an offer that allows you to pre-populate certain fields (such as email address) you could define that here:
In the next step we have to define the campaign as a “Path.” We will do that by selecting it in the radio box:
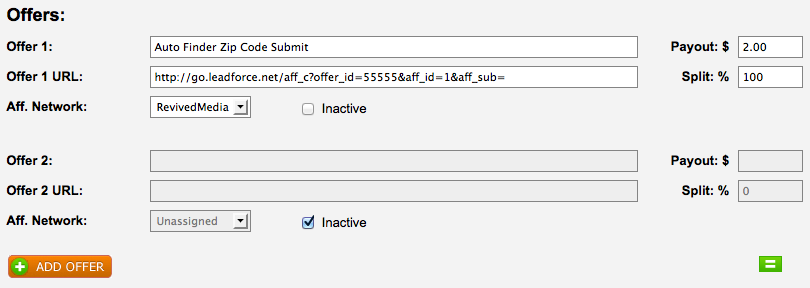
We then want to define the offer we’re going to be showing the user after they enter their name and email address. We could do an offer wall here as well but for this example we’re only going to have one:
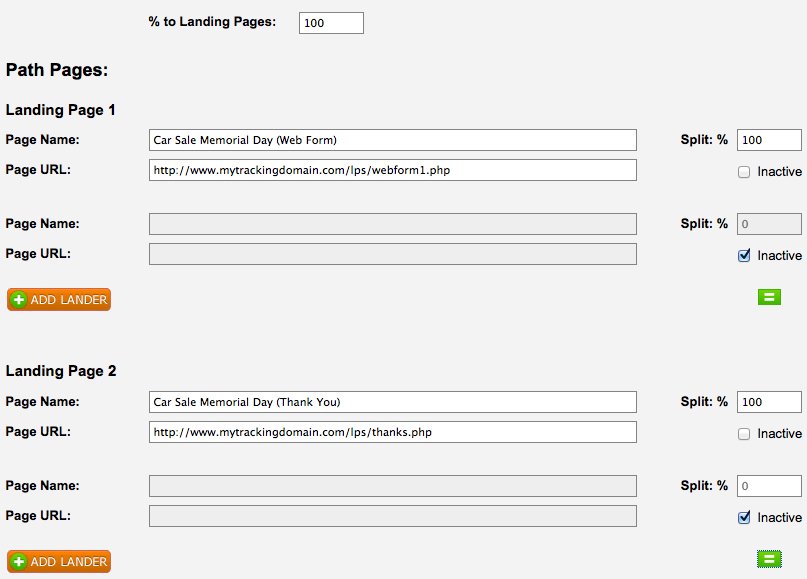
Next we are ready to enter the information about our landing pages. The first page is going to contain the AWeber web form we mentioned above. The second page is going to be a confirmation page informing the user that they need to validate their email address but is also going to include an outbound link to our CPA offer:
Notice you have the ability to rotate the landing page(s) but for this example we’re going to leave this option inactive. Make sure that your pages (both the web form and the confirmation page) end in .php. The campaign can then be created.
Once the campaign has been created we’re ready to implement the tracking code on our pages so everything will report inside the iMobiTrax interface. To begin, you want to set the “Tracking Options” to “Off Domain – Cookies (Advanced).” You can use other tracking methods, but for the simplicity of this tutorials we’re going to use this method:
We then need to place some Javascript at before the closing of our page that includes the web form:
The next step is to have our redirect code include the link to the next page of the path:
When you’re setting up your form inside AWeber you’ll want to make sure you check the “Forward subscriber information to your thank you page” option. You can set this custom “thank you” URL in this step or do it manually. Just make sure your code looks similar to the above screen capture.
Finally, you’ll need to add that same Javascript to your “thank you” page so all of the information posts correctly back to the database:
This is also the page you’ll include the link out to your CPA offer:
So all together your confirmation page will look like this:
Once all of these steps are completed you’re ready to take your campaign link and start purchasing your media! When visitors begin to follow your tacking link to your landing page that contains your web form you can instantly begin to monitor the number of people that opt-in and their email address will be stored in your database:
This tutorial is very a simple example yet shows the power of iMobiTrax can have with all of your lead generation campaigns. If you’re currently capturing leads from mobile traffic and not using iMobiTrax you’re missing out on capturing a bunch of data. Immediately after implementing our software you’re not only able to monitor the leads that you’re getting in real time you’re also able to have important information about the lead such as: Manufacture, Name, Model, Combined Name, Marketing Name, Type, Operating System, Display Size, Resolution, and Data Speed, Referring URL, IP Address, Carrier, Internet Service Provider, Country, and any user-defined custom Tokens.
To show the entire process I recorded a video and uploaded to Youtube:


