At times you may find yourself the need to create an offer wall; a landing page that contains multiple outbound links to offers. A lot of application developers will create landing pages that include their “top apps” on one page where they can focus on traffic distribution and then let the user decide which one they want to install. The same goes for owners of dating websites. Since mobile traffic can be challenging to target exact demographics, an offer wall allows the user to pick the exact site that suites their needs.
iMobiTrax offers the ability to track these landing pages so you can easily see which offer converts the best with any given traffic source. That way you can tailor your landing pages to display the top converting offers towards the top and are able to capture the most ROI out of your traffic:
This can easily be setup in a couple easy steps. To begin create a new campaign and select “Landing Page” as the campaign type:
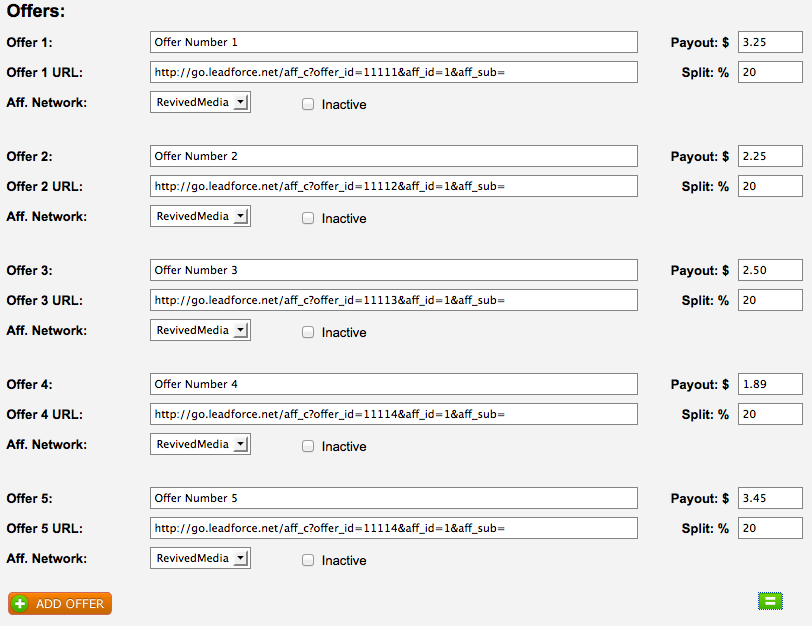
You’ll then want to enter all the information about the offers you’re going to be inserting on the page. In my example I show fields for five offers. iMobiTrax has the ability to track as many offers are you would like:
Notice that you enter in all the information about each offer: Name, URL, Affiliate Network, Payout, and Split %. Given we’re going to “hard select” the offers for our offer wall landing page we can simply click the green weight button after we complete all the offer information to assign them even weight. That feature will be irrelevant in this example. You the enter information about your landing page. If you would like, you also have the option to split test unlimited number of pages to find the one that yields the best conversion rate. In my following example I’m assuming we have two pages:
You need to enter an unique landing page number, URL, and then you can click the green weight button to assign them a split percentage. Please note your landing pages must be PHP (.php extension) for tracking to work. Once you have entered all this information you can then create the campaign.
Once the campaign is created you’re almost finished – there are just a few tracking codes you need to place on your landing page. Scroll down to the bottom of the campaign and notice your tracking options. In my example I’m assuming that the landing page is going to be hosted on the same server as my iMobiTrax installation:
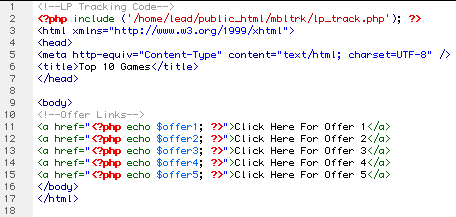
We will want to take this code and insert it before the beginning of the HTML tag in our landing page(s):
You then need to set your offer links. On the campaign page in iMobiTrax you will notice:
Since we’re setting up tracking for an landing page with multiple offers (an offer wall) we need to “hard select” our links to ensure traffic routes correctly. Therefore if our page has five offers we would setup the links accordingly:
As you see, we “hard select” the offer links by inserting the number: $offer1, $offer2, etc. We make sure these correspond to the links we setup above. Remember, iMobiTrax has the ability to include unlimited offers. Once all of the above has been completed, ensure your post-back pixel is set at your affiliate network, grab your campaign link, and you’re ready for traffic distribution. iMobiTrax will automatically begin tracking all of your clicks, landing page impressions, unique offer clicks, offer conversion rates(s), offer click through rate(s), and offer conversion rates(s). In real time you’ll be able to see detailed information about the top converting devices, carriers, network speed, etc.
Never before has tracking multiple offers on a landing page been this easy. We take all the guess work out for you allowing you to focus your time on what’s important: creating better converting pages and scaling your traffic distribution!


