Affiliate marketers around the globe rely on pay per view traffic sources for large volumes of distribution. We developed iMobiTrax to efficiently handle the load and track conversions in real time allowing ROI to be considered every step of the way. One of the most popular pay per view networks is Trafficvance and with a couple of simple steps you can have your campaign up and running in no time.
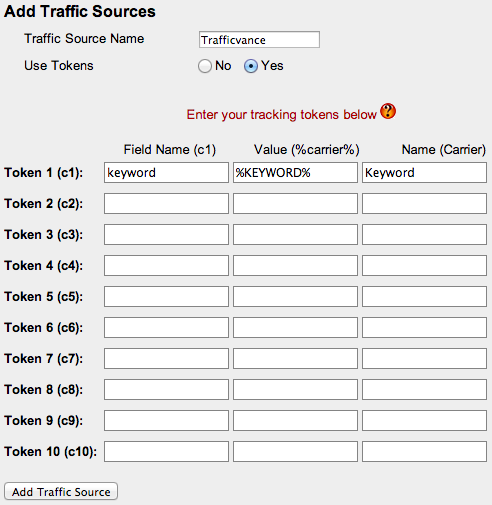
To begin we simply want to add Trafficvance to our traffic source group. This is the same way as we would add any other additional source however we’re going to insert a custom token to pass the keyword/URL we’re receiving traffic from to help us with optimization:
%KEYWORD% will dynamically be replaced in our tracking link to reflect the source we’re bidding and receiving traffic on. In real time, we’ll be able to measure our ROI and determine which source is going to perform the best for our campaign(s).
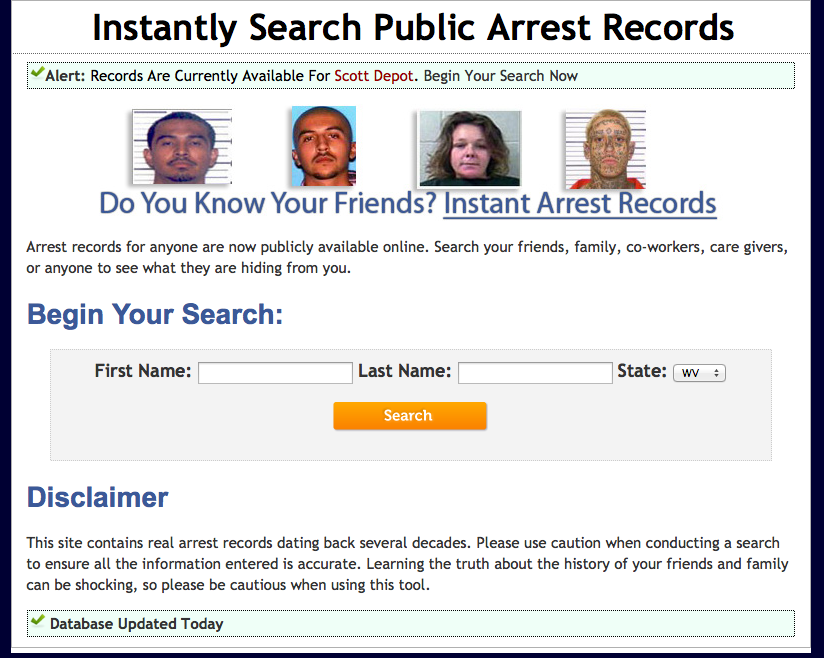
We then want to create our campaign so we can begin our implementation. For this tutorial I’m going to be using a simple landing page as historically pay per view traffic converts better with more pre-selling:
To get started I simply name my campaign, define a group, set the traffic source, and enter a value for my initial CPC. Since Trafficvance charges each time my landing page is viewed I’m going to enter the amount I’m going to start bidding from the beginning. For this example, I’m going to assume that I’m starting my campaign at $0.05 per view:
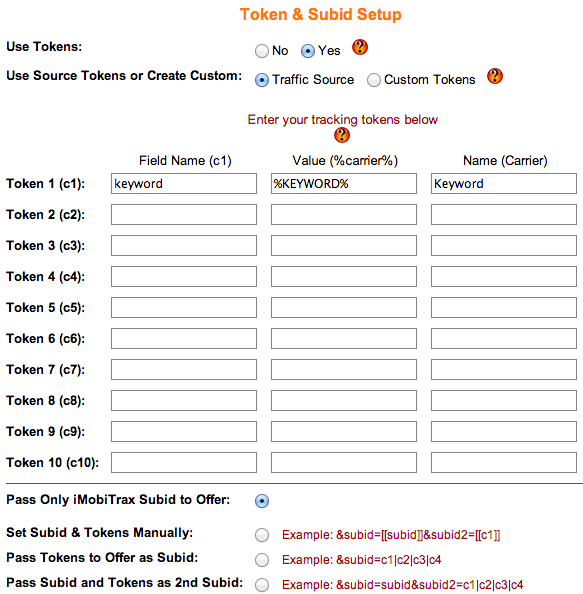
Next we want to Use Tokens from the Traffic Source and this will be pre-populated with the value we entered in the first step above. Since we already configured this, we can just double check for accuracy, there is no need to make changes unless we want to add any additional tracking tokens:
We’re then ready to configure our landing page and offer. Since we’re going to be using our own custom landing page we want to select this as our campaign type:
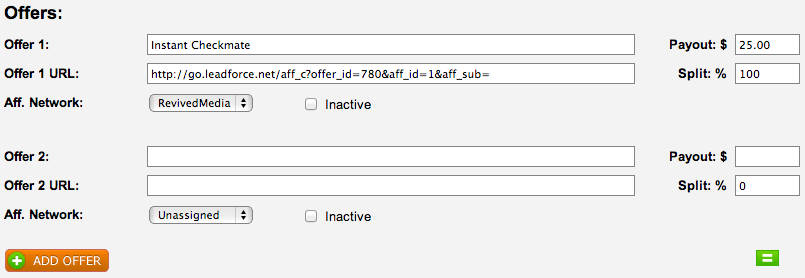
The offer is then setup. We enter the name of the offer along with the URL, payout, and split percentage. In this example we’re not going to be split testing the offer so the weight will simply be 100%. At the end of the URL we make sure to append a SUBID variable so iMobiTrax can add a unique number for each individual click allowing us to track the conversion flow:
As you can notice we’re free to add as many offers as we would like to here. This comes especially handy when trying to split test through various dating offers to find the one that responds the best to your traffic.
For this example, we’re ready to enter the information about our landing page so we can get the tracking codes and get started:
Notice the different options:
% to Landing Pages – If we would like to split test direct linking vs. using a landing page then we could define this here. For this example, we only want traffic to pass through the landing page, we’re going to leave it at 100%.
LP 1 Name – This is where we enter the unique name for our landing page. If we want to split test another one, we would fill in the value under LP 2 Name, etc.
Split % – If split testing our landing pages we would enter the percentage of traffic we want to hit this particular page. We can simply click the green weight button to equally distribute traffic across all the landing pages.
LP 1 URL – The complete URL to the landing page. Keep in mind this must end in .php so the tracking codes will render correctly.
Once we finish entering all the information about our landing pages we’re ready to create the campaign and get our tracking codes.
First we want to insert our main tracking code. This is found directly under Tracking Options:
Using our favorite HTML editor (I use Dreamweaver) we’re going to insert this directly above the opening HTML tag:
We then have to make sure our tracking links are correctly inserted:
Take note of the PHP code in both of the above codes. This is the reason your landing page must end in the .php extension. If we were rotating through multiple offers the above link would automatically rotate through them based on the percentages we set above.
Finally, we’re ready to set our post back URL and we’ll be ready for traffic distribution:
Notice we end our postback URL with the variable that carries the unique SUBID from iMobiTrax. For our example it is {aff_sub} but this will vary depending on the tracking system used for the offer you’re promoting.
We’re then ready for traffic distribution using our tracking link:
This is going to route all traffic to the landing page we setup, track the exact URL/placement name we’re targeting, and we’ll be able to monitor our click through and conversion rate in real time. iMobiTrax has been optimized to ensure all of your pay per view traffic makes it to your landing page and can be optimized on the fly. Our easy-to-use reporting system allows you to create many custom reports and analyze all the metrics of your campaign. Happy tracking!


