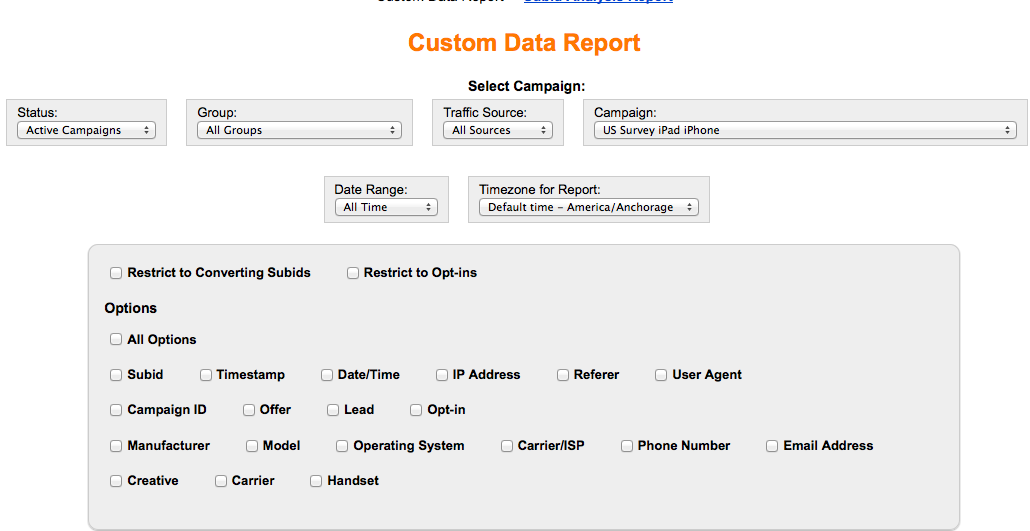
2 Types Of Reporting Available: Custom Data Report | Subid Analysis Report
Custom Data Reporting:
- Select Campaign Status (All, Active, Inactive)
- Select Group
- Select Traffic Source
- Select Campaign
- Select Date Range
- Select Timezone For Report
Ability to Restrict data based on Converting Subids | Restrict To Opt-Ins
19 Reporting Options Available In ImobiTrax:
- All Options
- Subids
- Timestamps
- Date/Time
- IP Addresses
- Referrers
- User-Agents
- Campaign ID
- Offers
- Leads
- Optins
- Manufacturers
- Models
- Operating Systems
- Carrier/ISP
- Phone Numbers
- Email Addresses
- Creatives
- Carriers
- Handsets
You can generate a report with all options, or select options. Whichever you prefer.
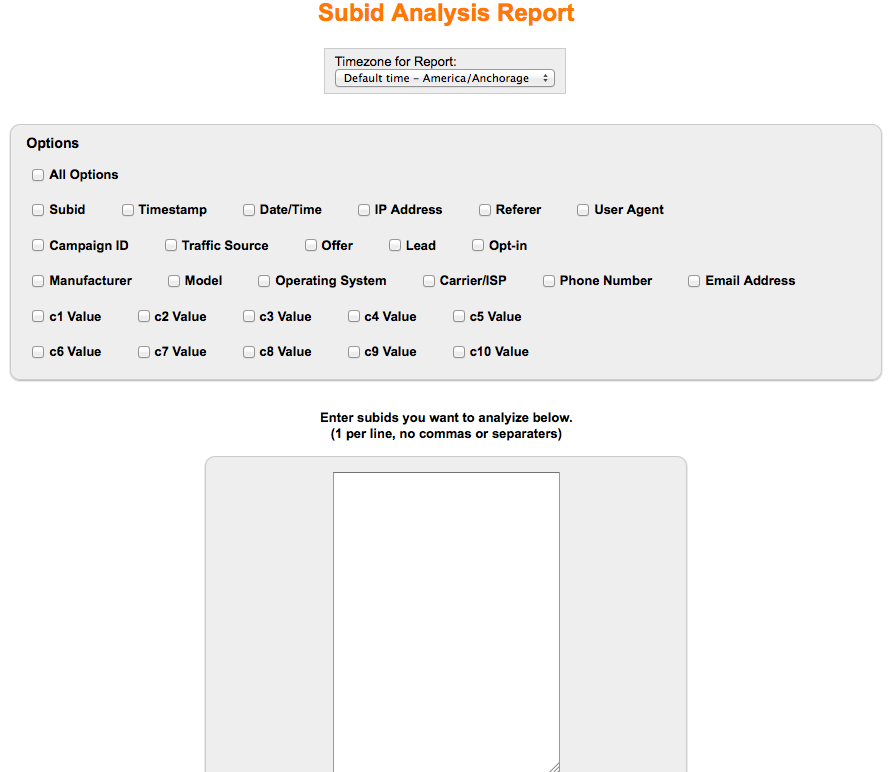
Subid Analysis Reporting:
– Select Timezone For Report
Choose from 18 Subid Analysis Reporting Options:
- All Options
- Subids
- Timestamps
- Date/Time
- IP Address
- Referrers
- User-Agents
- Campaign ID
- Traffic Source
- Offer
- Leads
- Opt-in
- Manufacturer
- Model
- Operating System
- Carrier/ISP
- Phone Number
- Email Address
- c1 Value
- c2 Value
- c3 Value
- c4 Value
- c5 Value
- c6 Value
- c7 Value
- c8 Value
- c9 Value
- c10 Value
Simply choose your appropriate reporting options and paste enter in your subids that you want to analyze. (1 per line, no commas or seperaters). Click Create Report. Done.
Subid And CPC Updating:
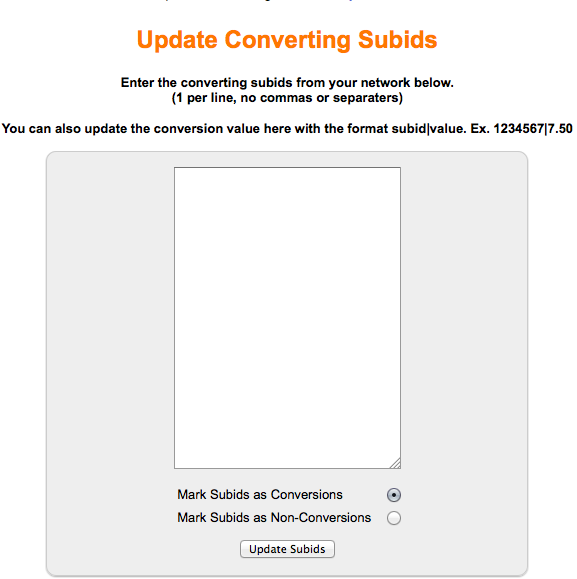
Subid Update – From the Subid Update tab, you have the ability to utilize two features in ImobiTrax – You can update converting subids from your affiliate network as well as update the CPC (Cost Per Click)
Updating Converting Subids – Simply Enter the converting subids from your network below (into the white box). (1 per line, no commas or seperaters)
You can also update the conversion value here with the format subid|value. Ex. 1234567|7.50
Before updating your converting subids, you optionally have the ability to choose between Marking the Subids as conversions and/or Marking the Subids as Non-Conversions.
Simply click on “Update Subids” and your data will report back to you accordingly.
Updating CPC
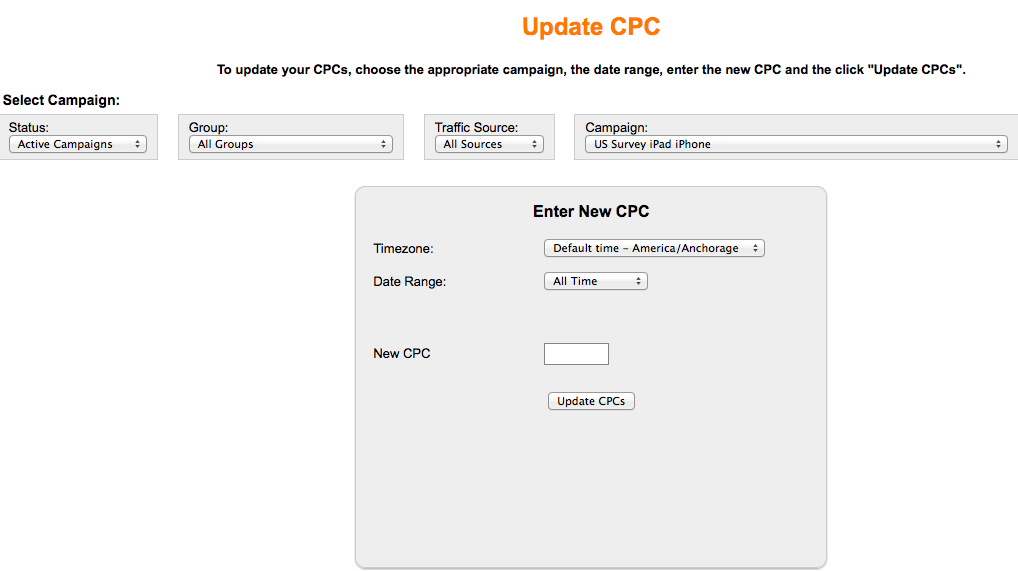
Updated CPC – Optionally you have the ability to update your cost per clicks. To update your CPCs, choose the appropriate campaign, the date range, enter the new CPC and the click “Update CPCs”.
Simply:
- Select The Appropriate Campaign Status (All, Active, Inactive)
- Select The Appropriate Group
- Select The Appropriate Traffic Source
- Select The Appropriate Campaign
Then to enter the new CPC simply:
- Select The Appropriate Timezone
- Select The Appropriate Date Range
- Enter The New CPC
- Click Update CPC’s
- Finished!
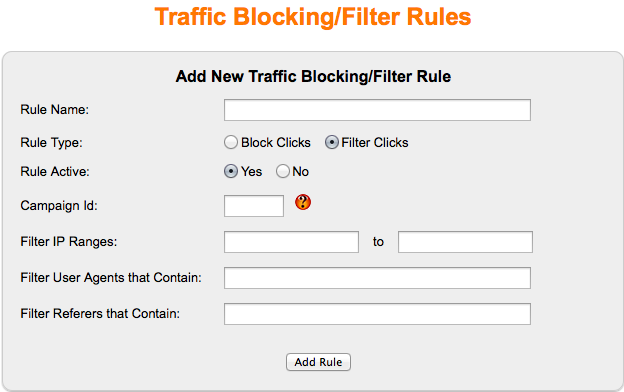
Traffic Blocking/Filtering Rules
Add New Traffic/Blocking Filter Rules:
- Enter Rule Name
- Enter Rule Type (Block Clicks, Filter Clicks)
- Enter Whether Rule Is Active (Yes, No)
- Enter Campaign ID (Enter 1 specific campaign id to limit the rule to that campaign. Leave the field blank if the rule is for all campaigns. Click “View Campaign List” to see a list of active campaigns and their respective campaign id.)
- Filter IP Ranges (Enter An IP Range “From” Through “To”
- Filter User-Agents That Contain (Your Values)
- Filter Refers That Contain (Whatever You Like)
- Click Add Rule
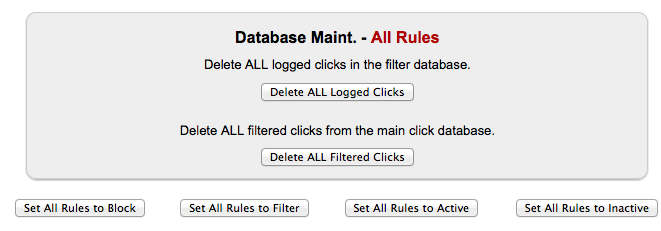
Database Maintenance – All Rules:
– Delete All Logged Clicks In The Filter Database ( Labeled Delete All Logged Clicks)
– Delete All Filtered Clicks From The Main Database (Labeled Delete All Filtered Clicks)
You Have The Ability To:
- Set All Rules To Block
- Set All Rules To Filter
- Set All Rules To Active
- Set All Rules To Inactive
Existing Traffic Blocking/Filter Rules:
All Columns Are Sortable By:
- Rule Name
- Rule Type
- Campaign ID
- IP Ranges
- User Agents
- Referrers
- Active
Statistics Values will show up for Logged, Recorded and Filtered.
You also have the ability to set active/inactive as well as edit or delete this data.

