Continuing on with our series of traffic source campaign setups, I wanted to shoot-out our next Adult Marketing Tutorial featuring…Traffic Junky!
If you’re not familiar with Traffic Junky, they are basically a Self-Serve Marketplace to buy ads on some of the most popular adult web and mobile web properties in the world.
In other words, they kickass for adult web+ mobile traffic.
Here’s an easy to follow tutorial on how to setup campaigns on Traffic Junky:
What You Need:
- Hosting
- iMobiTrax Tracking
- Revived Media Affiliate Account
- Offer
- Creatives
- Descriptions + Restrictions For Targeting
Step 1. Offer Recon + Assets Gather
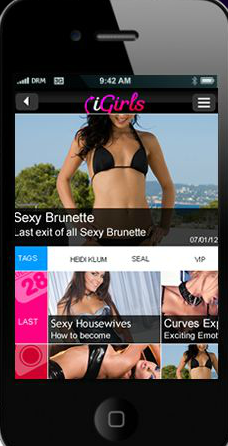 Revived Media – In your affiliate panel, you will want to test Offer ID: 1696 – iGirls Greece
Conversion flow: The user arrives at the landing page and selects the content they want to download. As long as they’re in an accepted WAP gateway their MSISDN header is detected and they don’t have to manually enter their phone number. They’re then sent an SMS message with a link they must click for the conversion pixel to fire.
Accepted carriers: Wind
Target devices: iPhones & Androids.
Payout: $5.60 CPA
Accepted traffic: Adult, Media Buys, Search, Push Notifications, Mobile Applications, and Mobile Web.
Restrictions: No incent, content locking, or wifi traffic.
Creatives: Tons of pre-approved banners + text ads to start testing.
Tip: I see a few of the 300×250, 300×50 and 320×50 Mobile Banner Placement Size that I like so much and I know Traffic Junky has mobile inventory on that ad unit. Taadaa!
Step 2. iMobiTrax Campaign Setup
Few tips here. One, Traffic Junky does have custom IP Telco Targeting. Their are options to narrow down certain carriers by IP Addresses. Currently they allow it for some of the more knowledgeable people, so you will have to inquire about it. Second, Traffic Junky doesn’t have any traffic/click tokens/parameters that I’m aware of.
We add Traffic Junky as a traffic source, no custom tokens:
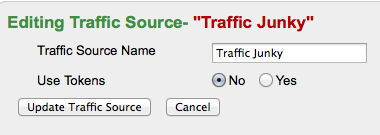
Don’t worry. When we setup the campaign, we can quickly put int the “ad1? tokens and values so we can track each creative/banner/text ad’s performance:
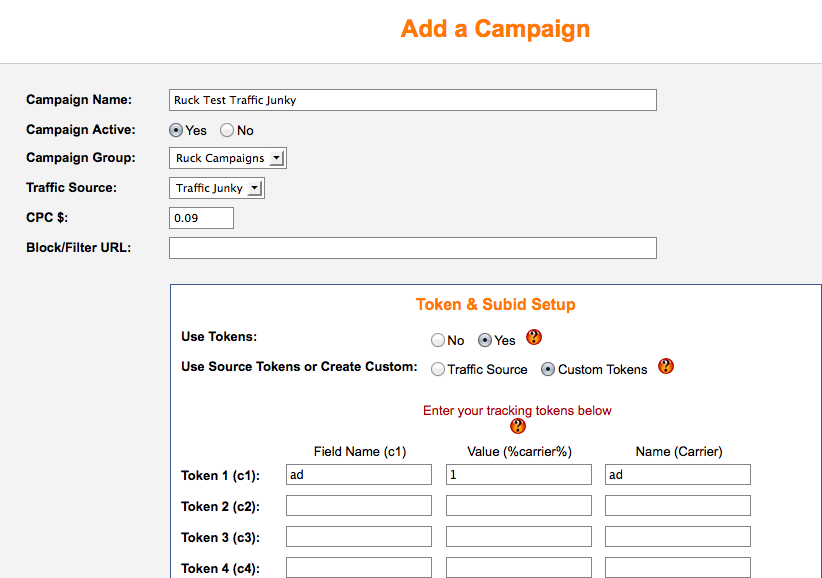
Great, I’m now setting up my campaign in iMobiTrax. I’ve set my campaign name, Active Yes, Campaign Group, Traffic Source, CPC (Cost-Per- Click) to my ads and I’m also using the custom “ad” token so I can track which banners are performing the best on Traffic Junky for my campaign.
Now, I’m going to scroll down and enter my offer names, urls, payouts.
Luckily, this a simple direct-linked offers from the banners and I’m not split-testing any other offers against it. (Because I know it converts).
Correct Setup From Revived Media + iMobiTrax
You come to a point, where there is a little back and forth between your Revived Media Panel and iMobiTrax Campaign Setup. I want to make that as smooth as possible here.
Revived Media – So, the first thing is to scroll through your offer, until you get down to the Generate Tracking URL Box. This is what you see:
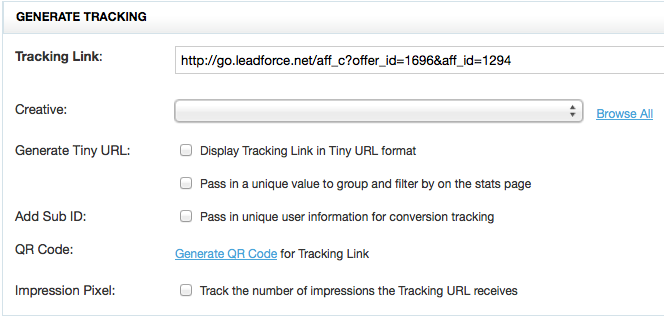
Revived Media – Click on “Add Affiliate Subid” type “xx” into the box. Click Update, and look at your new link in the tracking link box now:
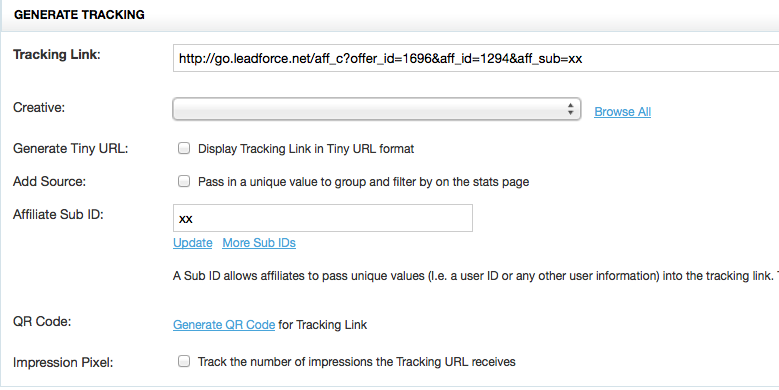
Now, take that link, but after &aff_sub=, chop the xx. Don’t use it in iMobiTrax. Chop the xx off, so the affiliate link looks like this, then input this as your offer url in the boxes provided:
https://go.leadforce.net/aff_c?offer_id=1696&aff_id=1294&aff_sub=
That’s where your affiliate subid number is dynamically inserted for that campaign. Right after your subid comes the custom tokens you set in iMobiTrax for easy analysis and shuffling around.
Now, when I got to pull the 2nd lp from Revived Media and construct my link. I added xx to subid and clicked update, but now my link looks funky Ruck?

Really, this is simple too.
See the &aff_sub=xx
Copy that from the url, and stick it on the end. Basically, swap out &url_id=2086 with &aff_sub=xx. Also, make sure you cutoff the “xx” directly before sliding into iMobiTrax.
Just make sure it looks and displays correctly before implementing into iMobiTrax. The current iMobiTrax form for your affiliate url above would be:

https://go.leadforce.net/aff_c?offer_id=1438&aff_id=1294&url_id=2086&aff_sub=
Seriously, iMobiTrax campaign is setup. Scroll down until you see your campaign link. Make sure to always test it! Also, grab your postback URL from iMobiTrax and place it correctly in the offer at iMobiTrax that you are running:

See the &ad=1?
That’s your first campaign link to your first banner in Traffic Junky.
Then your second banner, copy n paste same url but change out the =1 to =2 so it looks like &ad=2 for banner 2. Proceed to do that for each individual banner and you will be able to report back which ones are performing good / poor for you. Simple! ![]()
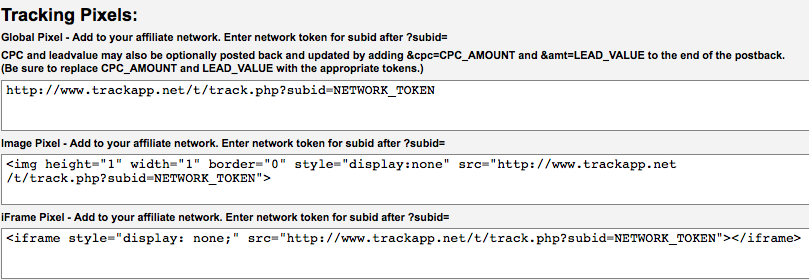
Your postback in iMobiTrax looks like this on the end of ?subid=NETWORK_TOKEN
Grab the entire post back url from IMobiTrax. Paste into the Postback URL box of Revived Media:
Make this in iMobitrax that you pasted into Revived Media:
From this –> https://www.trackapp.net/t/track.php?subid=NETWORK_TOKEN
To This –> https://www.trackapp.net/t/track.php?subid={aff_sub}
Click Save. You’re done with Revived Media + iMobiTrax. Now, it’s time to setup that campaign on Traffic Junky!

Ryan, Bill and myself have that entire campaign process down in under 2 minutes flat. Once you have access to traffic sources, and you have your traffic sources, their extra token information, their ad unit types and sizes and ad options they offer, you can literally walk in with iMobiTrax and level the place to the ground, that’s why we built it.
Well, to be straight up, Traffic Junky has crap for mobile targeting options, I went very generic with my targeting. That’s the power of iMobiTrax. Doesn’t matter what I speculate or walk into, it’s there to record and display everything down to the most granular of variables. Ok, back to Traffic Junky setup:
TJ First Step – Pricing & Campaign Inventory
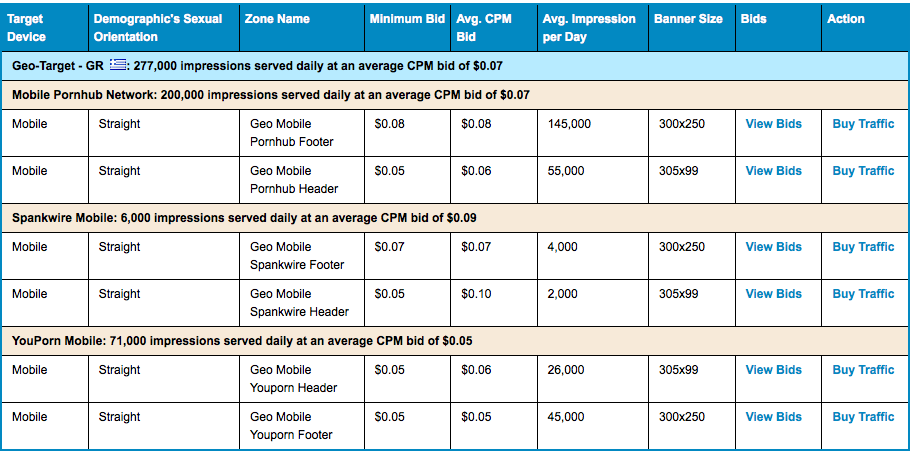
You can see I chose, Greece + Mobile + Straight Inventory:

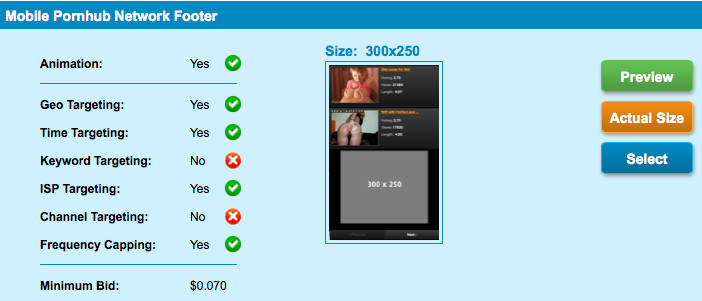
Great, I see some Mobile 300×250 placements I can test. So I choose to buy this placement below:
![]()
300×250 Mobile Footer Banner at $0.08 per 1,000 impressions ( 8cent CPM).
Great, I’ve got two banners for this campaign at sizes 300×250. Let’s do this!
In Traffic Junky, after you choose a site to buy ads on, you have to pick a zone. Pay attention closely here as I’ve been messing around and bought the wrong size placement, more than once, acting like a jackass. Here’s the one ad unit I wanted:
Then I enter my campaign information into Traffic Junky:
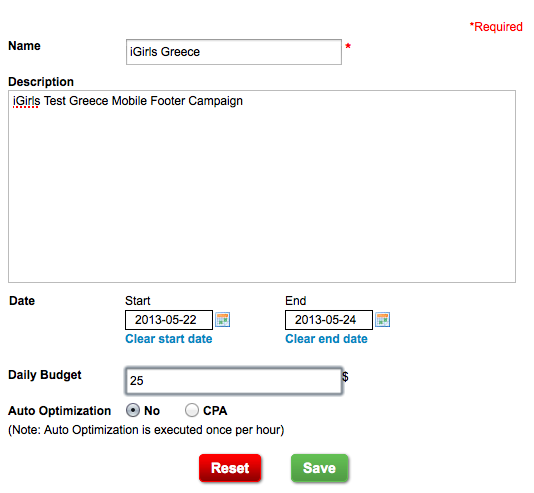
Set my budgets, shieettt mobile greece is expensive. At least on paper it looks that way. Won’t know till we test!
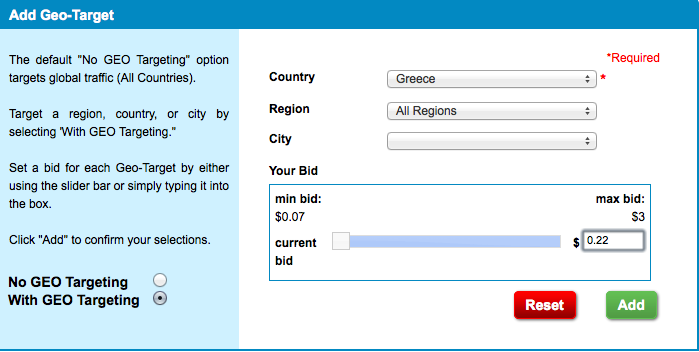
Now, we’re going to input our creatives. There is a little bit of back n forth here with iMobiTrax. So pay attention:
I took our campaign link –> https://www.trackapp.net/t/click.php?c=33&key=00cj56ywak21o487dll650e1&ad=1
I took our two banners –
Campaign Link 1 = Banner 1 + 2d=1
Campaign Link 2 = Banner 2 + ad=2
Upload the two banners + hotlink them to each imobitrax campaign link ad=1 and ad=2 accordingly and happy testing!
